Showing posts with label Sewing. Show all posts

Wednesday, August 10, 2011

Meet my newest little decorating accents


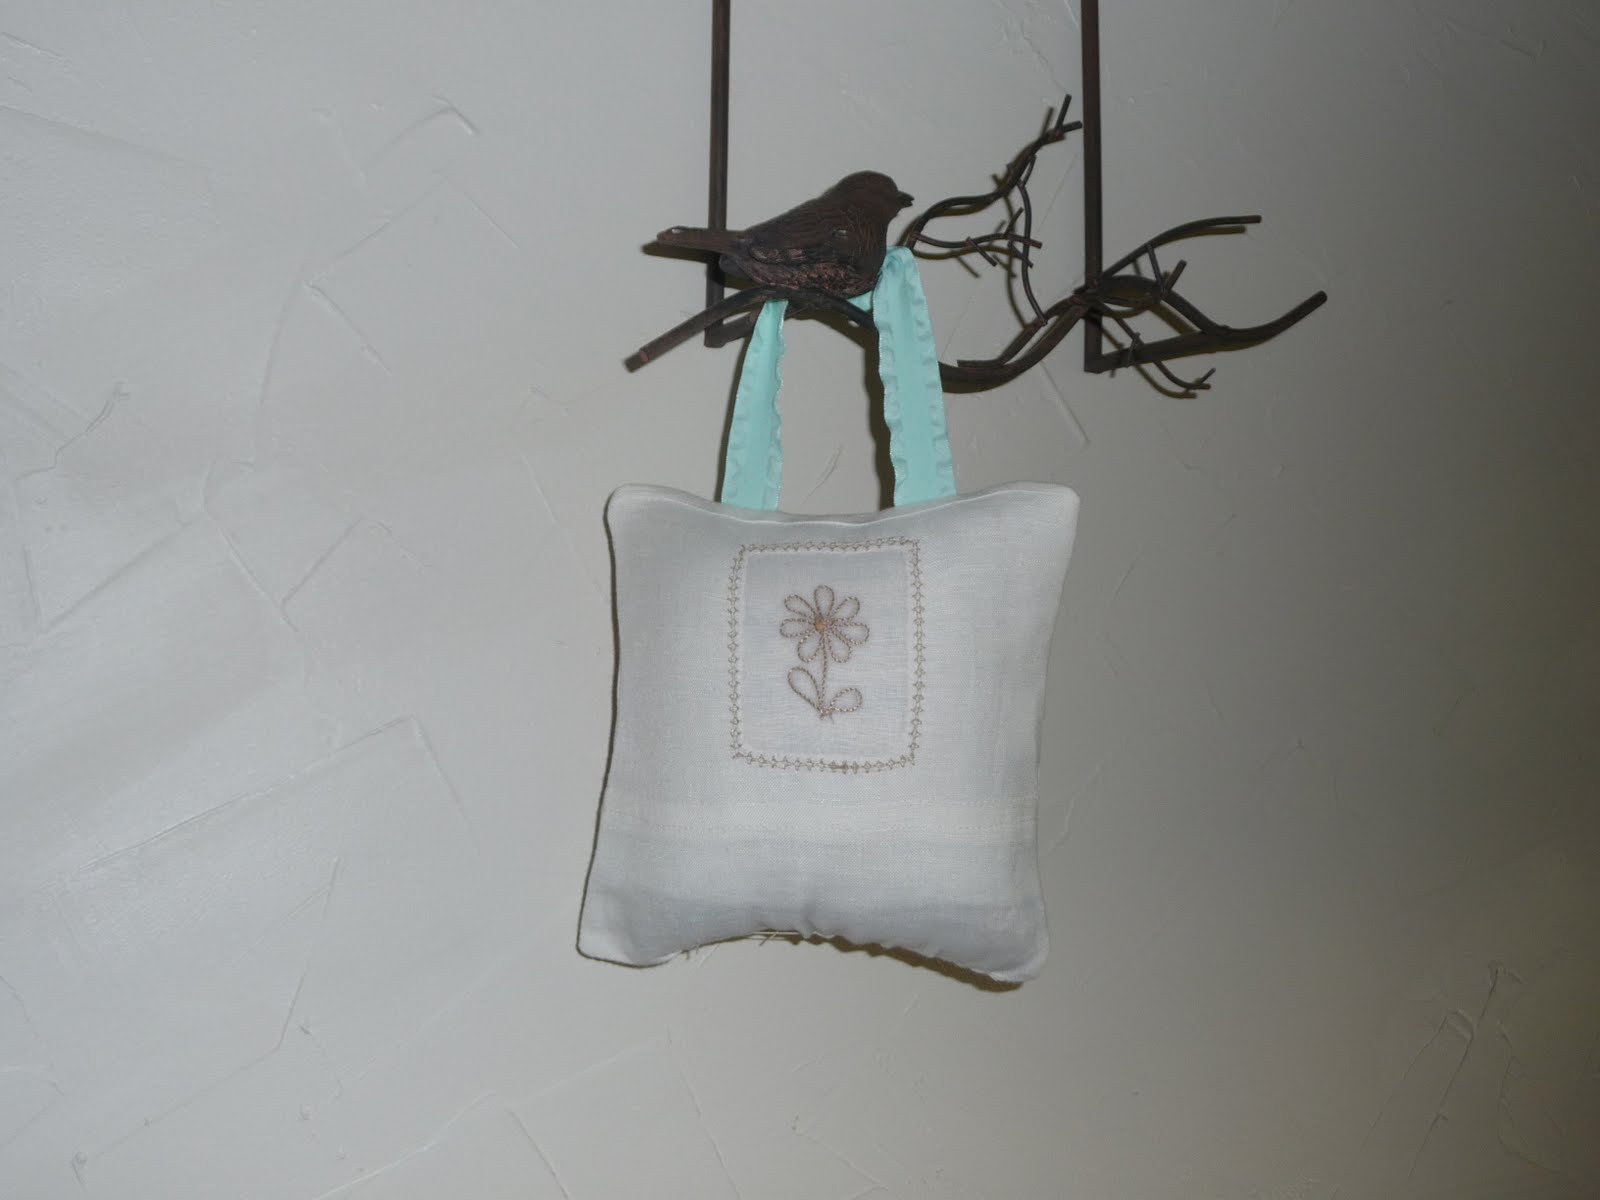
Hello everyone. Sorry I have been away from posting on our blog; everyone is so...busy. Had to share this cute new idea to reuse older items. I love needlework in all forms and this past winter, began cutting them down to a smaller size and ended with a cute small pillow to hang anywhere I needed a splash of color. Possibilities are endless.

Thursday, May 26, 2011

Pillow postings


I love to make pillows. Show a small piece of needlework to me or perhaps a tea towel or even better, anything cross-stitched and I will make a pillow. I rarely hang a piece of art created in needlework. I had rather do a pillow for a special chair or sofa (can't do a matching set). My favorite type of pillow is a small dkp -known as door knob pillow. You can hang it from any place that needs a splash of color or to celebrate the memory of a loved one. This cute sort of modern take on a pillow was created by cutting a variety of pieces from favorite shirts and blouses you can no longer wear. I love the splash of RED. The big C pillow created by me used a sample monogram piece from my aunt Renate, using her embroidery machine. Lucky for me, she gives me all her sample items and I enjoy using them to create really unique pillows for friends and family. Of course my cousin Patty's last name is a "C" and I know she loves toile and a splash of red. She will use this on a gorgeous black rocker recently purchased. The small oblong pillow was created by using a great piece of needlework by our deceased Aunt Grace. Years ago, she began to do each state flower and I was fortunate to have acquired them after her death. Patty's daughter lives in LA, so it was great to have a home already picked out by the time this small pillow was completed. Enjoy it Amy! Thanks for checking our blog; all of us busy but we check in once in a while. Happy Memorial Day - can't believe how the time is rushing.

Thursday, January 13, 2011

Happy Valentine's Day


Hello - Excuse the brief absence; we've all been quite busy with holiday fun, removal of Christmas and all the other exciting chores we are involved in. I wanted to "get the jump" on Valentine's Day by showing off this cute heart. I love to recycle and reuse and was thrilled to find a much too small gorgeous RED sweater that needed a new look, so I did the usual - After shrinking it in hot water and drying same, I drew different sizes of hearts, cut them out, using a couple of buttons for embellishments and after two hours of looking for a tip in some book to show "how to do a blanket stitch", I thought of Google. Silly me - should have looked there first. I love the simplicity of this little number and it will find it's new home hanging on a door knob or perhaps hanging on a suction cup in a window. Hope you like it. Again - Happy Valentine's Day.

Sunday, October 31, 2010

From tablecloth to a "needed bed skirt"


I switch tables out like you would not believe. I must have owned about nine or ten during my lifetime. My current house is the only place I have lived that offered a separate room off the kitchen as a dining room. I used it as such for years, but always gravitated to the small table in the kitchen, or perhaps the small bistro table on the screened porch (off the kitchen). Our dining room was used mostly as a "pass through" to get to the short hall and bathroom, so a few years ago,Carl and I decided late one night to do some rearranging and get rid of the dining room atmosphere all together. It has worked quite well, for now I have a small TV room that tends to be our favorite spot. The windows face west and even on severely COLD days, the room receives plenty of sunshine to warm you. So, after all this explaining, I arrive at the reason for today's post. I was rummaging through my huge collection of tablecloths and found this really pretty, white with small blue scallops and cut-out work. Needing another fresh cottage look in our guest room, I removed about twelve inches from the center and still have the CENTER of the tablecloth to make a nice pillow sham. I had sufficient length to do several pleats which compliment the bed skirt. Careful planning and cutting is my only expense to this recent project. One of the photos shows a small view of my recent slipcovered rocker.

Tuesday, October 26, 2010

A cast-away chair gets new life


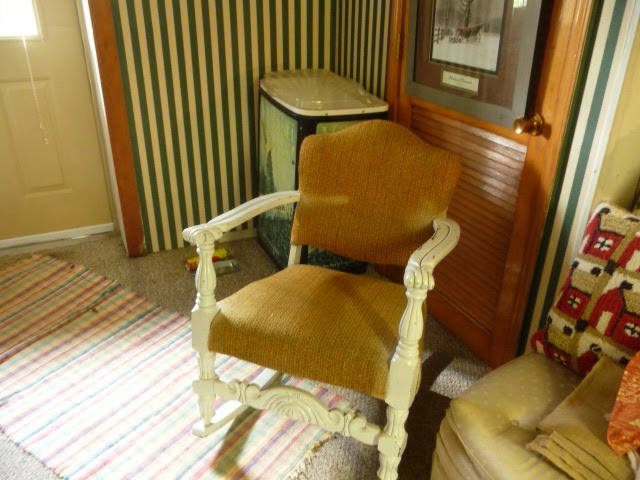
This old rocker has been around my sister's place for years; we traded a chair a few years ago and in the swap, I acquired this one. It was painted white a couple of years ago and nothing else done to it. It has sat outside in the elements for over a year and you can see from the BEFORE PHOTO - painting was done without any taping, so I decided yesterday to start a slipcover from a nice piece of Waverly fabric. I'm so.............glad I remembered to wash FIRST in hot water and dry because it shrank quite a bit. This little gem will come upstairs now and enjoy a corner in my guest bedroom. You gotta love this fabric in ANY color.

Monday, August 30, 2010

Slipcover 101 - finished project for my book


For those that follow on a regular basis, I promised a post of completed slipcover. That was a while back, I'm ashamed to say, but it is FINISHED now. This project was by far, the most difficult and challenging, but that was because of my fabric choice, NOT the slipcover itself. I've completed three in the past, but NEVER NEVER NEVER attempt one with something this difficult to match. I am motivated to start on a slipcover for a small sofa we use daily but the fabric is not my choice, so the next BEST THING to do is a slipcover. I plan to purchased several good quality painters cloths - WASH THEM FIRST in hot water and dry in a drier which will shrink fabric BEFORE MAKING SLIPCOVER. In addition, washing will make the painters cloth much softer and easier to work with. Hopefully I will enjoy this cute slipcover in my living room where it proudly sits. Can't wait to show it off to my guests. A lot of my friends who visit are probably wondering "has that slipcover been completed yet?" but they are much too kind to ask.

Thursday, June 3, 2010

Once upon an apron . . . . . . . . . . .

Needing to locate a piece of brown fabric in the correct shade and not being successful, I did my favorite thing.........................check out our local Goodwill. I stopped by and found the apron posted below. The perfect shade of brown - it was a done deal at $1.
This little number would become a cute pillow for my niece Keely's bedroom - Added some neat ribbon trim and the pillow was complete. Don't be intimidated by not finding fabric for a small project, look for a ready made item and redo it. The main thing - you will repurpose something that someone else will treasure.

Saturday, May 22, 2010

From a favorite linen skirt to neat accent pillow


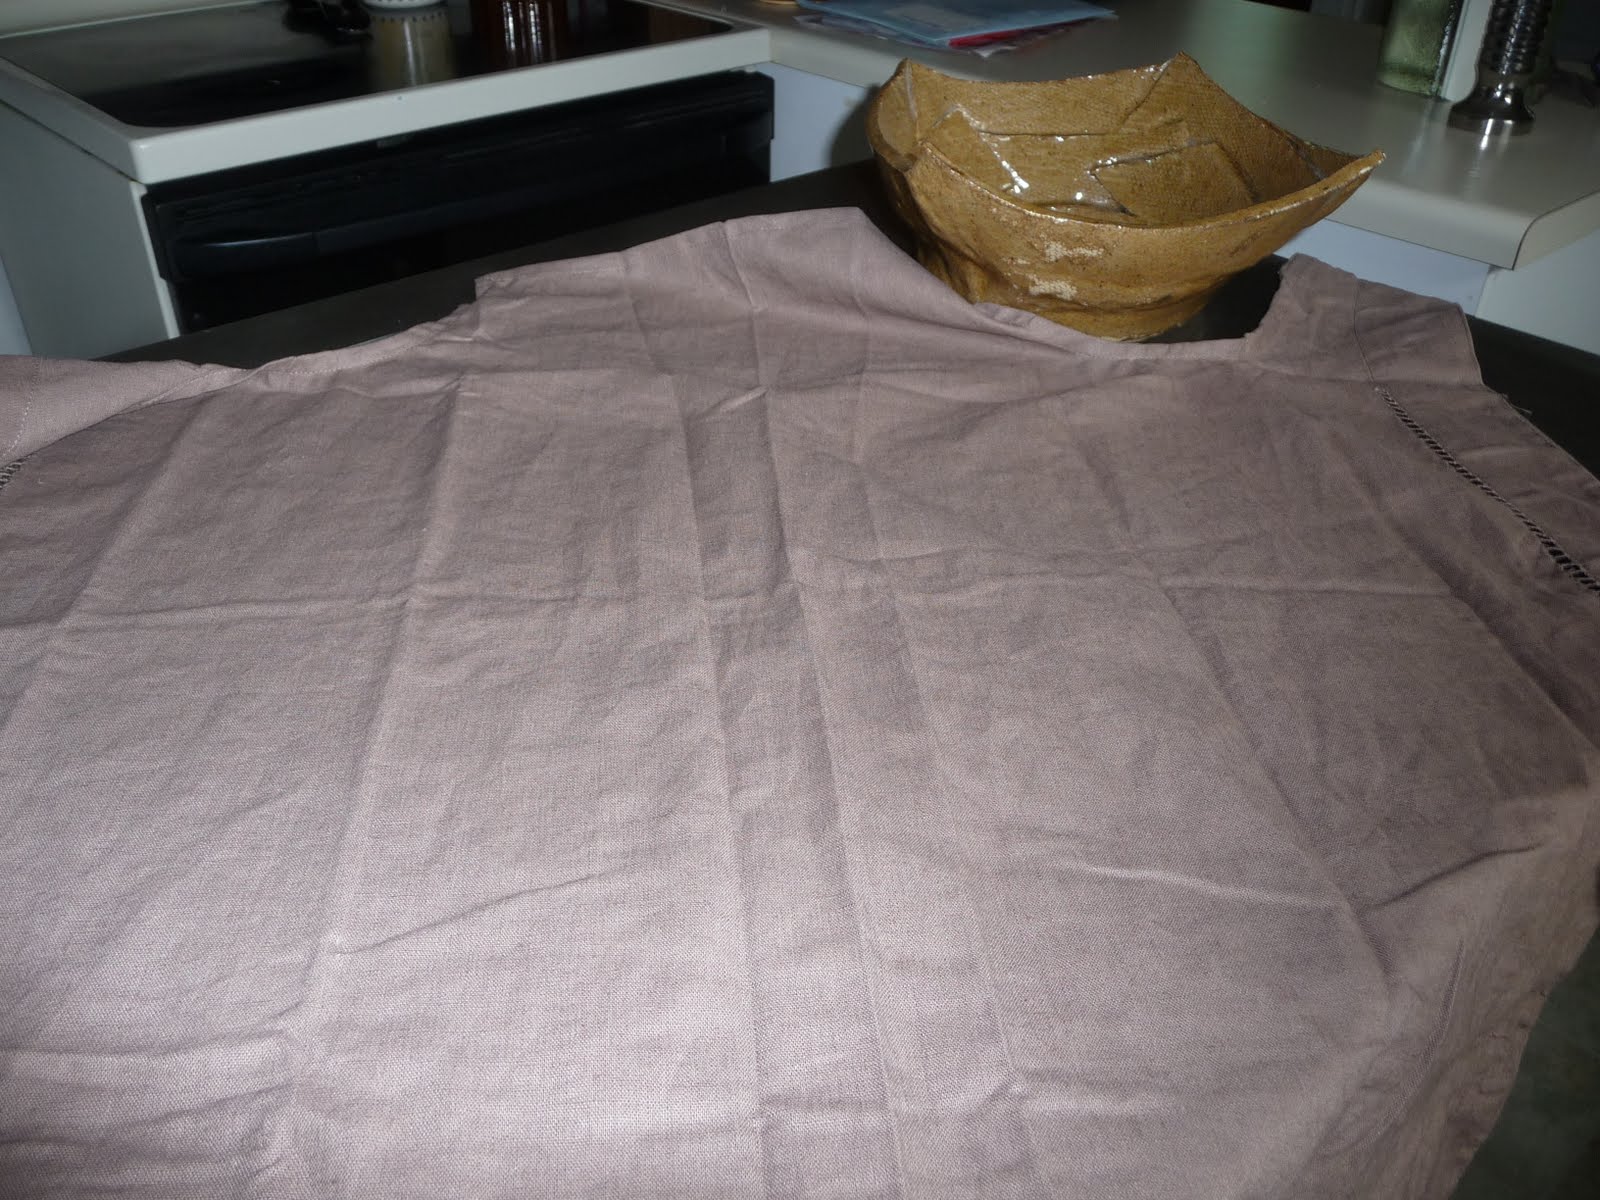
Here I go again!!!!!!!!!!!!!! - Needing to share a post with you, I rummaged through my old clothes - many of which I can no longer wear, BUT BUT BUT I love the thing, kept it in my closet for years, hoping to get back into a size 8, but as we all know, as we age, our bodies do too. I'm in a 10-12, but recently decided to "go with it - face it and know that I will NEVER get into some of these clothes AGAIN". Rather than give them to Goodwill, I opted to make something really cute and enjoy that favorite garment in another way. I loved the simple white linen skirt with the ever so slight dark beige thread that made up the edge of the flowers on the bottom of the skirt. Lots of top stitching on this skirt, which adds to its beauty. I cut two sections of the skirt, leaving a good edge to allow for hem and created this cute pillow. I love to hang pillows of this type EVERYWHERE. I recently completed my bedroom walls with sheet rock compound to cover up some really BAD plaster. Didn't know what to hang over the bed, so I opted to hang a cute item and thought about the pillow - I think its really cute and is just the right amount of simplicity to compliment the rest of the room. You can see just a small portion of the neat silk brown/turquoise cornices - IF you don't have a favorite skirt to use in this manner - a cute initial done on a pillow would work well.

Friday, May 21, 2010

From bedspread to setee cover


When this nice all white chenille bedspread was purchased years ago, I didn't realize it was a full size - it has been stashed away until yesterday when I decided to look at it closely. I have no full size bed, so the next best thing to do was to recycle. The wicker settee on my screened porch needed a quick fix for the summer and the other cover I made earlier was beginning to fade. All I had to do to make this work was measure the length for the hem, being careful to not cut into the basket work design of the spread. Hems on each side gave sufficient coverage to allow a portion to drape over the back of the settee. Using the same four bed pillows makes for an easy fix to last until fall. Love to recycle anything - that's my goal. Do you recycle items - move them to another spot in your home - most any item serves multiple purposes - as Gayle says "think outside the box". Oh - the small tablecloth on table was made earlier from another bedspread.

Friday, May 7, 2010

Recycle/repurpose when you can


Recently picked up a great looking Eileen Fisher 100% silk jacket at the Salvation Army while visiting my cousin Patty in Alexandria Va. The size was way...........too small (PSM) which clearly is a petite small. I knew the instant I spotted this treasure that it would become a neat, one-of-a-kind pillow for my bedroom. I love anything that resembles tucks (after all - it's my last name). Removing the sleeves was first, then I simply cut the front of the jacket ACROSS from seam to seam, turned it wrong side out and using the front opening (no zippers or buttons were on the jacket)sewed the appropriate size to fit a pillow form I switch out all the time. I used a complimenting ribbon down the front of one side and it was complete. Took less than 10 minutes to re purpose this gorgeous jacket. Now - what should I do with those neat sleeves? Any suggestions???????????

Thursday, April 29, 2010

Sage striped slipcovers REALLY do cover


Here I go again, needing to redo two lawn chairs that have been around longer than most of us. The two chairs in question must have a couple of dozen layers of paint and I am not keen on paint removal, so.................... you know me, I do the next best option. Sew a slipcover for the chair. I was fortunate to find several yards of a very good 100% cotton fabric and the strip is so faint, you hardly notice it. Without too much fuss and not requiring a zipper nor Velcro, this project turned out pretty good. By Saturday, I will have the matching chair fully dressed out in its finest coat ever. No VOC issues and no messy paint to clean up. How good does it get?

Thursday, March 11, 2010

From sweater to pillow cover - how dare you?


You know me - I love to repurpose ANYTHING. Recently I have been going through my favorite old sweaters - we all have more than one I'm sure. I loved the sweaters and couldn't wear them and could not bear to see them discarded to Goodwill (as much as I love GW shopping), so I did the only alternative - I made something else out of it. The white ribbed pillow cover was made first, during the winter months. I just cut the exact off the top and sides and KEPT THE OPENING which would normally be on my waistline. This was the easiest pillow cover EVER sewn by me and I love it. I can recall the sweater each time I see the pillow. The cute one with the tiny pink flowers - I just purchased this at the BEST SALVATION ARMY shop on the east coast. It's in Alexandria, Va where I visit with my cousin Patty. She was with me when I purchased this last weekend and I just had to have it. So cute and it only cost $2.50. I kept the sleeves for another project. It's 100% cotton, Made in USA - and I already had a small pillow that fit it. You have to try this project on a sweater - you will love it and the beauty part, it pulls off so easy to wash, when soiled. As Candace says "how divine".

Tuesday, March 9, 2010

Leaves and branches - resting quietly


Just had to share this new pillow I recently made. While waiting at our local beauty salon a few weeks ago, I was perusing a magazine while waiting for color. I caught just a glimpse of a cute pillow that was offered for sale for around $68. Appliques are a favorite, so I looked through my fabric stash, located some brown fabric suitable for the branches, but didn't have a piece of green. I looked around my Goodwill items I had accumulated recently and spotted a neat blouse, too tight to wear any longer, so I cut my leaves out and found my last precious piece of canvas fabric from the old slipcover my mother had made over twenty years ago. I've used every piece of this thing over the years and I had enough to make the pillow. After working with the zig zag on my old trusty Singer, I completed the project in less than two hours. Pretty nice and it didn't cost more than $4. Love it when a plan comes together, don't you?

Thursday, February 18, 2010

Best in Show - different approach to photos


Meet Julia - my new little subject for pillows. What a perfect way to compliment a photo - use with fabric to make a "one of a kind" pillow for your home. For those that sew - don't you just love the fabric you can run through the printer? A former sewing technique that I have reintroduced to home decor. Enjoy - This little number will be given to Julia's mom Molly - my cousin Patty's (who regularly posts comments) daughter in law.

Wednesday, February 17, 2010

From table setting to pillow


Could not resist purchasing two sunny yellow tulip shaped place mats at Marshall's yesterday. I broke my promise to NOT purchase anything MIC, but with some sewing notions and fabric items, you just gotta do what you gotta do - they were reduced to less than half price, so the total of both of them was $3.14. I rummaged through my fabric stash and found a coordinating fabric that looks nice with the tulip I think. Appliqueing tulip to a large piece of fabric (measure for pillow to be inserted) was easy and I had some fabric to do cording on one pillow. The mate to this one may have to be relegated to male status and be displayed without cording - since it is difficult to work anyway. Placing these bright, cheerful pillows will welcome SPRING in any city. Observe our ticker each day - it's closer than you think.

Friday, January 29, 2010

Jelly Rolls aren't just for snacking..........


A couple of years ago I took up quilting, though, on a very small scale. I would NEVER venture to make a quilt large enough for an adult to sleep under. I resign my sizes to baby quilts, wall hangings or the table topper as you see here. My aunt presented me with a beautiful Jelly Roll from Moda Fabrics over two years ago and this week, I decided it was time to get something created. I love the Chinese coin quilt pattern, so I started searching the Internet for ideas and decided it would be easier to just find a photo and do it on my own. The collection consists of citrus colors with all designs, so this made part of the project easy. I decided to do a different border and used some solid strips in the collection as they reminded me of limeade, orangeade and lemonade. Hey it's February and when I was getting my table items set to take a photo - I decided that I would have hot tea - rather than iced. In 51 days, we will meet up with SPRING. I will be happy to sit at this cute table scape and have Gayle (perhaps Keely can join us with Easton) over for iced tea. Victoria: hope you like the table topper - I enjoyed our chats about it.

Friday, January 15, 2010

Dressing for spring presentation . . . . . .


Needed to come up with new cushions for my settee on screened porch, off the kitchen and decided to use one single twin flat sheet I had purchased a while back. The flowers and bright red says "Welcome" and the covers were made to fit some extra bed pillows - if you sew - this would be an easy way to make new covers and change the theme often without the expense of purchasing new cushions. The main thing to do is measure your piece of furniture and USING the wide hemmed edge of the sheet - allow for a seam and cut sheet and hem. If you left the opening at the edge of settee, you can slip pillows in and your bottom section is completed. Cover two more pillows for the top portion and you will be finished. I use the pillow opening technique to allow for covers to be washed when needed or changed to another theme. Perhaps I should do a tutorial - my sister Gayle will have to assist on multiple photos. If you need assistance, post and we will come up with a tutorial. Happy sewing!

Tuesday, January 5, 2010

When painting is NOT an option .............


New approach for 2010. Do you have a table - one that you truly love, but the stain on it is not exactly one that will gain an award from HGTV, BUT, you do like the legs on it and you need the piece where its being used. Try sewing a fitted piece of garment - sort of like a slip cover, but much easier. This particular piece had  nice splayed legs, but I never liked the strange shape of the skirt on the table, so yesterday while temperatures were way too...........low to get out of the house, I began a search for a piece of fabric in my stash, of course. I found a couple of slip covers for a sofa I used almost twenty years ago and when they were washed for the first time, they SHRUNK about 30 percent and could not be used again, so a new sofa was purchased, I kept the covers since the fabric was great for pillows and trim and making covered cords, etc. - The cover has a tailored look and I did a lot of top stitching which makes them extra strong. Carl keeps this little table near his recliner and eats most of his meals on it, while viewing old westerns - I do have to reward him once in a while for assisting in so.......many of my projects. The thing I love, love, love about this is I recycled the piece and no money spent. How divine is that? Happy Sewing in 2010.

Saturday, November 28, 2009

How to make Christmas Tree Napkins

I received an email for this pattern from Nancy's Notions but was unable to share the video with you but it's very easy to whip these napkins up in a flash.....To make the Christmas Tree napkins, cut two circles 14" diameter in coordinating fabrics. For ease in sewing I place something 1” smaller and mark outer edge with marking pencil or pen. This will assist when you are sewing a round circle – you need to keep it EVEN. With right sides together, sew all around and leave an opening for turning. Trim edges close to stitching and make slits every few inches. Turn and press. Slip stitch opening, making sure to keep it even and round. Now for the fun part and when you will see the Christmas Tree literally come to life before your eyes – Fold 1/3 toward you on your favorite side of fabric – Turn circle to the right and fold 1/3 again, then back to the left to make tree shape. Press – and place at your table setting. So cute and I bet you’ll be the first one in your circle to have these complimenting your Christmas table this year. Enjoy